Flat Lay Clothing Photography: How to Shoot It and Turn It Into On-Model Photos
How to shoot flat lay clothing photos that sell: surface, light, styling, camera angle and editing, plus how to turn flat lays into on-model photos.
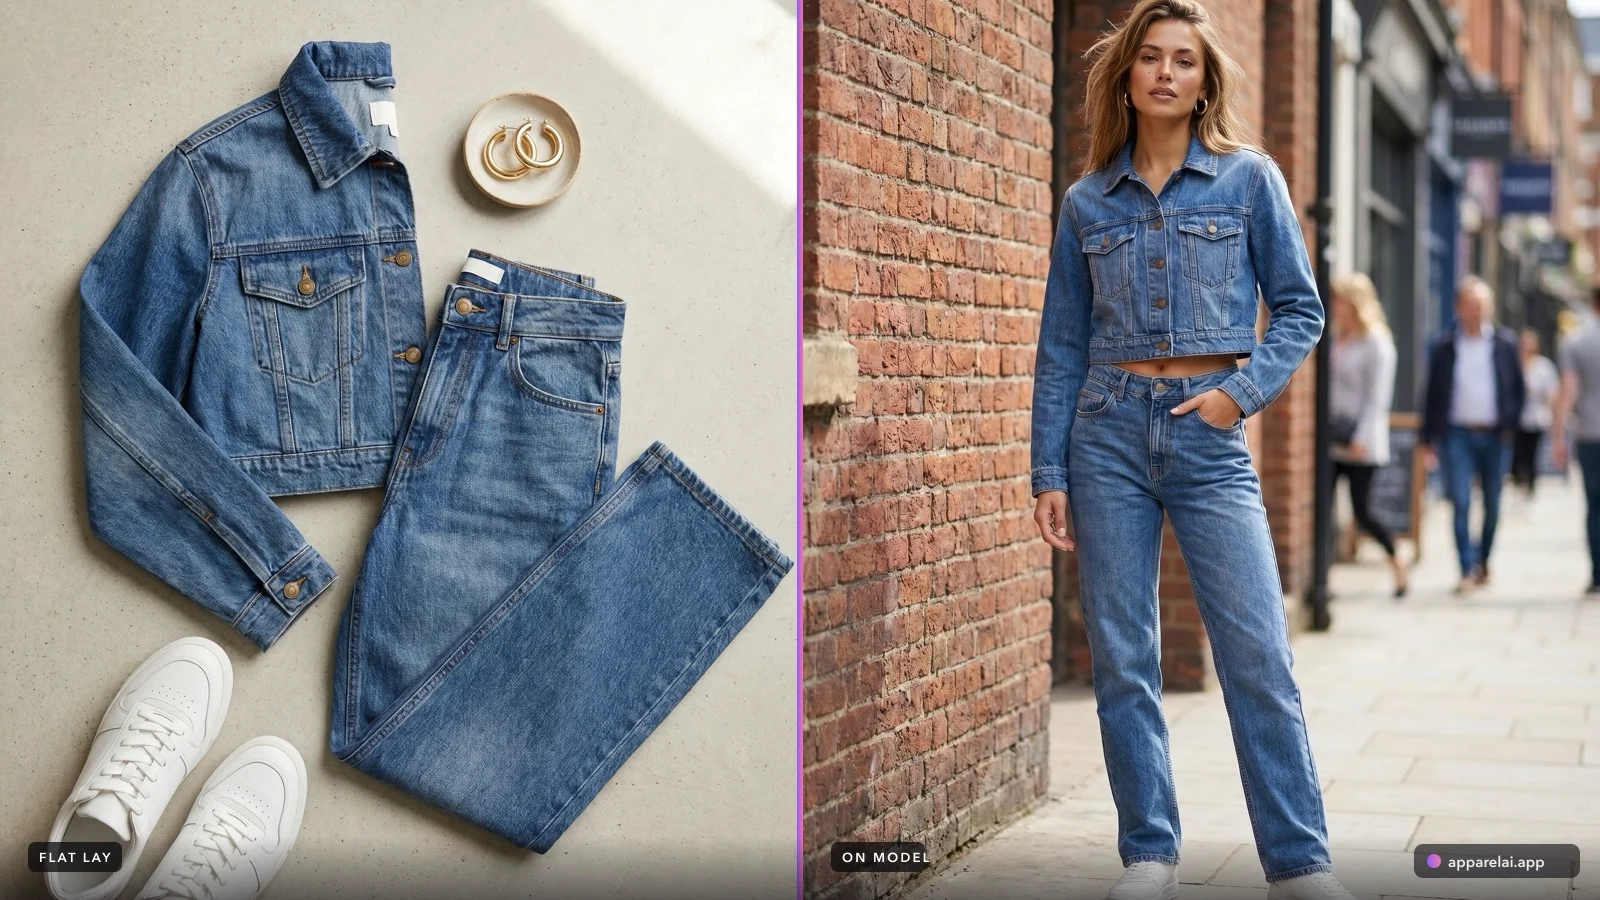
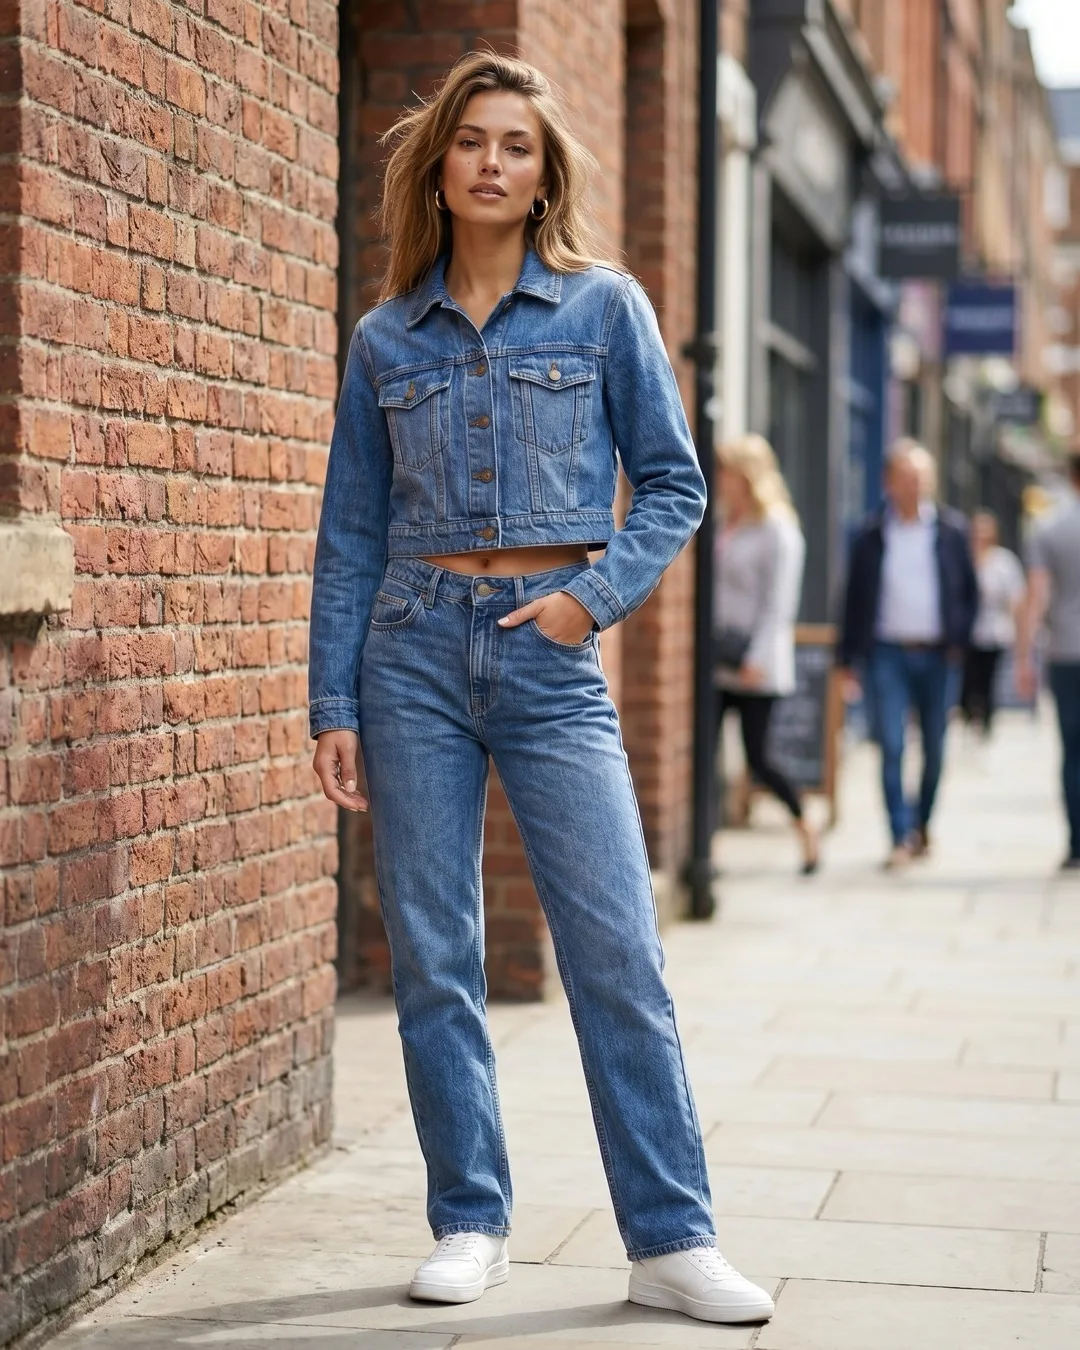
A flat lay is a photo of a garment laid on a flat surface and shot from directly above. It is the cheapest and fastest way to photograph clothing, it works with a phone, and it is the best starting photo for turning a garment into an on-model image with AI.
This guide covers the setup, lighting, styling, camera settings and editing for flat lays that look professional, then shows how to turn them into on-model photos. To compare flat lays with studio and on-model shoots, see our clothing product photography guide.
When to use flat lay photography
Flat lays work best for garments that keep their shape lying down:
- •T-shirts, sweatshirts, hoodies and knitwear
- •Jeans, shorts and other structured bottoms
- •Kidswear and babywear
- •Sets, outfits and accessories laid out together
- •Social posts and marketplace gallery images
They are weaker for garments whose appeal is in the drape or the fit: flowing dresses, sheer fabrics and tailoring. Shoot those on a mannequin or a model, or use the flat lay as the input for an on-model AI photo. For structured pieces, an AI ghost mannequin shot is another option.
What you need
| Item | Budget option | Professional option |
|---|---|---|
| Surface | White or light grey foam board or poster board | Roll of seamless paper on a large table or the floor |
| Light | Large window with a sheer curtain | Two softboxes at about 45 degrees |
| Camera | A recent phone | DSLR or mirrorless camera, 35 to 50 mm lens |
| Support | Step stool, phone held level | Tripod with a horizontal (overhead) arm |
| Colour reference | Sheet of white paper | Grey card |
| Styling kit | Steamer or iron, lint roller, tissue paper, pins | The same, plus clips and painter's tape |
How to set up a flat lay shoot
- Pick the surface. Use a plain, matte surface: white, light grey or light wood. Avoid patterned sheets, strong wood grain and shiny surfaces that reflect colour onto the fabric. For white garments, use light grey so the edges stay visible.
- Set up the light. Use soft, even light from the side, either a window with a sheer curtain or two softboxes at about 45 degrees. Put a white board on the side opposite the window to lift the shadows. Avoid direct flash and a single overhead lamp, which flatten texture and cast hard shadows.
- Position the camera directly above. The camera or phone must be parallel to the surface, not tilted, or the garment will look stretched at one end. Use your phone's level or grid to check.
- Fix the height. Keep the camera at the same height for every garment, and mark the garment position on the surface with tape. Every product in your catalog will then appear at the same scale.
- Lock exposure and white balance. Put a sheet of white paper or a grey card in the first frame of the session and set your exposure and white balance from it.
How to style clothes for a flat lay
- •Steam and lint-roll first. Every crease and fibre shows up at full size.
- •Tops: square the shoulders and lay the sleeves slightly angled down, or fold them neatly behind the body. Taper the waist slightly so it looks like it has a body shape.
- •Add volume: slide tissue paper inside the body and sleeves so the garment looks filled out rather than pressed flat.
- •Bottoms: lay jeans and trousers with the legs straight and slightly apart, and the waistband fully visible.
- •Dresses: define the waist, then spread the skirt evenly so the hem is symmetrical.
- •Hide fixes at the back: pins and clips go behind the garment, where the camera can't see them.
- •Sets and outfits: leave space between pieces so each one reads clearly.
If the flat lay is only an input for AI, style it differently: no props, no sleeves folded behind, buttons fastened, and the whole garment visible in its natural shape.
Camera settings for flat lays
On a phone:
- •Use the 2x lens if you have one; it distorts less than the wide lens.
- •Turn on the grid and level, and turn off flash, filters and portrait mode.
- •Tap the garment, then hold to lock focus and exposure.
- •Shoot in the highest resolution your phone allows.
More phone tips: how to take phone photos of clothes that AI can use.
On a camera:
- •Aperture f/8 so the whole garment is sharp.
- •ISO 100 to 200 for clean detail.
- •Shutter speed to suit the light; on a tripod, slower speeds are fine.
- •Shoot RAW and set a custom white balance from your grey card.
Editing checklist
- Straighten and crop to the same aspect ratio for every product.
- Make the background pure white (RGB 255, 255, 255) if you sell on marketplaces.
- Match colours to the real garment in daylight. Colour mismatch is a common reason for returns.
- Remove lint, dust and stray threads.
- Export at the size your channel needs. Shopify recommends 2048 x 2048 px for square product images and accepts files up to 20 MB (Shopify help). Amazon needs at least 1,000 px on the longest side for zoom.
Common flat lay mistakes
| Mistake | What it looks like | Fix |
|---|---|---|
| Camera tilted | Garment wider at one end | Shoot parallel to the surface; use the level |
| Hard shadows | Dark edge on one side | Diffuse the light and add a white bounce board |
| Colour cast | Whites look yellow or blue | Set white balance from white paper or a grey card |
| Flat, lifeless garment | Looks pressed and two-dimensional | Add tissue paper for volume |
| Cropped edges | Hem or sleeve cut off | Leave a margin around the garment |
| Inconsistent catalog | Products at different sizes and angles | Fix camera height and garment position with tape |
How to turn flat lays into on-model photos with AI
Shoppers want to see how clothes fit on a body, but booking a model for every product is slow and expensive. AI fashion model tools take your flat lay and put the garment on a realistic model, so one photo becomes both a flat lay and an on-model image.
The AI isolates the garment, maps it onto a model's body and renders it with matching light, shadows and folds. With ApparelAI, each image takes about 10 to 30 seconds.
Step by step with ApparelAI
- Shoot your flat lays in one session with the same light and camera position.
- Upload them to the AI fashion model generator, in batches of up to 50 garments on the Business plan and above.
- Choose a model; use one persistent brand model for the whole batch so your catalog stays consistent.
- Choose a scene: studio, street or lifestyle.
- Generate, then review every image at full size.
- Regenerate any image that needs it, then export at the size each channel needs.
For every setting in each step, see how to create an AI model photoshoot from a flat lay in the ApparelAI docs.
Input rules for accurate results
- •The garment is flat and free of creases.
- •The whole piece is in frame, with a margin.
- •The colour matches the real garment in daylight.
- •The print is straight, not distorted by a tilted camera.
- •Each part of a multi-part outfit, such as a top, bottom and dupatta, has its own photo.
- •Sheer fabrics are shot on a mannequin instead of flat.
- •Heavy embroidery gets an extra close-up with light raking across the surface.
The docs add file types and when to include a back photo: how to photograph clothes for AI photoshoots.
What to check before you publish
- •Colour and print match the real product.
- •Logos, labels and text are correct.
- •Length and proportions look right for the size.
- •Small details are still there: buttons, pockets, stitching, trims.
Flat lay photography ideas for social media
- •Outfit grid: the full look laid out together with shoes and accessories.
- •Folded stack: colourways folded and stacked to show the range.
- •Detail crop: a close-up of fabric, embroidery or a label.
- •Seasonal props: a few props that set the season, kept away from the garment.
- •Before and after: your flat lay next to its AI on-model version.
Try it: upload your best-selling product's flat lay to the AI fashion model generator and see it on a model in seconds.
Frequently Asked Questions
What is the best background for flat lay clothing photos?
A plain, matte white or light grey surface. Use light grey for white garments so the edges stand out.
How do you make flat lay clothes look 3D?
Put tissue paper inside the body and sleeves, shape the waist, and light from the side so the fabric shows some shadow.
Can I shoot flat lays with my phone?
Yes. Use soft window light, hold the phone level directly above the garment, use the 2x lens and lock exposure on a white sheet of paper.
How high should the camera be?
High enough to fit the whole garment with a margin around it, usually 1 to 1.5 metres for an adult top. Keep it the same for every product.
Can AI turn a flat lay into an on-model photo?
Yes. Tools like ApparelAI put the garment from your flat lay on a realistic AI model in seconds. New accounts get 3 free credits.
Ready to try AI product photography?
Start with 3 free images. No credit card required.
Start Free Photoshoot